How To Create A Journal Entry In Quickbooks
Advertiser Disclosure: Our unbiased reviews and content are supported in part by affiliate partnerships, and we adhere to strict guidelines to preserve editorial integrity.

Journal entries, as an accounting concept, can take a while to grasp. The good news? QuickBooks creates almost all of your journal entries for you automatically. The other good news? If you do have to make a journal entry, it only takes five easy steps.
This post will explain when you need to create a journal entry in QuickBooks and walk you through the journal entry process.
When To Create A Journal Entry In QuickBooks Pro
In double-entry accounting, a journal entry is used for logging which debit and credit accounts are affected by a given transaction. A journal entry is needed each time money is transferred between income and expense accounts. Journal entries are also recorded when money is transferred from an asset, liability, or equity account to an income or expense account. Journal entries are kept in a general ledger, which provides a complete record of the financial transactions of your business.
Journal entries are critical for an accurate record of your financial transactions. Journal entries are also important because they are the basis for many of your business's financial reports. Balance sheets, income statements, and cash flow statements all rely on accurate journal entries.
But what if you're new to accounting? Maybe you have a slight grasp of the concept, but you don't feel confident enough in your skills to input every journal entry accurately. No matter your skill level, don't worry. In most cases, QuickBooks takes care of all the double-entry accounting behind the scenes.
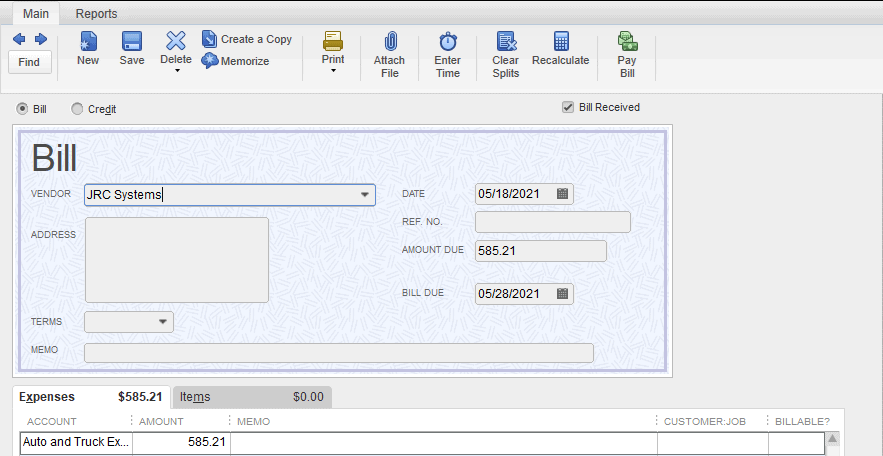
Whenever you enter a transaction (such as an invoice or bill) in QuickBooks, the software automatically creates a journal entry for you. Take a look at this bill, for example:

If we use the command shortcut Ctrl + Y, we can see the journal entry that QuickBooks automatically created for this transaction:

The entry tells us that Accounts Payable was credited $585.21, and the Auto and Truck Expenses account was debited $585.21. The debits and credits balance.
Again, QuickBooks creates an automatic journal entry for every transaction entered in QuickBooks. Additionally, the software will adjust the journal entries if you edit or change the transaction. So, most of the time, you won't need to worry about it.
However, there are a few cases where you may need to create a journal entry manually. For example, you'll need to create an entry for depreciation. Other times, you may need to create a manual journal entry to include asset purchases, interest on loans, stock adjustments, and capital contributions. When these transactions need to be recorded, simply follow these five steps:
How To Do A QuickBooks Journal Entry
To get started, go to Company>Make General Journal Entries:
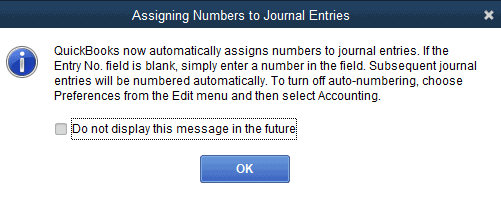
You may see a notification letting you know that QuickBooks automatically numbers journal entries. You can eventually turn off auto-sequencing or change the beginning number, but for now, just click "OK" to get started.

Step 1: Enter Date
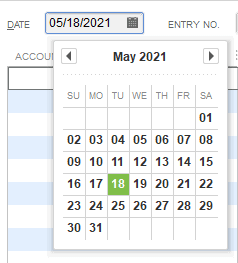
Use the drop-down calendar to enter a date for your journal entry. For our company, we're going to create a depreciation journal entry for May 2021.

Step 2: Adjust Entry Number (Optional)
At this point, you can adjust the beginning sequencing number of your journal entry. QuickBooks will automatically number your journal entries from here on out.
![]()
Step 3: Add Debited Account
In journal entries, you list the debited accounts first and then the credited accounts. If you need a refresher on debits and credits, read our Quick Guide To Accounting Terms & Abbreviations.
Select the account being debited. Then enter the amount under "debit." If desired, you can also add a memo, name it, and mark the amount as billable.

Step 4: Add Credited Account
Select the credited account from the drop-down menu. QuickBooks automatically enters the credited amount under "credit" because the debits and credits mustalways match. If desired, you can also add a memo, name it, and mark the amount as billable.

Step 5: Save
Check that all of the information looks correct and that the debits and credits match. Then click "Save & Close" or "Save & New" if you're planning on creating another journal entry.
![]()
If you make a mistake during the process, don't worry. QuickBooks gives you the option to edit, reverse, or delete journal entries. However, if you follow these simple steps, you'll be less likely to make errors.
For troubleshooting issues, check out the QuickBooks Community or call QuickBooks directly. Don't forget to check out the rest of our QuickBooks Desktop Pro 101 Series to learn how to enter bills, create a budget, write and print checks, and more.
Overwhelmed by QuickBooks Pro? Maybe it's time to switch to QuickBooks Online. QBO is easy to use, cloud-based, and affordable. Best of all, you can easily import your QuickBooks Desktop data into QuickBooks Online.
Outgrown QuickBooks Pro? Switch to QuickBooks Premier. It's the same QuickBooks Desktop software you love but with more users and advanced, industry-specific features.
How To Create A Journal Entry In Quickbooks
Source: https://www.merchantmaverick.com/how-to-create-a-journal-entry-in-quickbooks-pro/
Posted by: drakeimensid.blogspot.com

0 Response to "How To Create A Journal Entry In Quickbooks"
Post a Comment